Mostrar mensagens com a etiqueta Ideias para Acessórios//Ideas for accessories. Mostrar todas as mensagens

quarta-feira, 2 de fevereiro de 2011

O meu primeiro knock-off : cinto de laço // My first knok off : bowtie belt

Há dias fiz o meu primeiro (de muitos, espero eu) projecto knock-off, ou seja, um projecto de imitação :) 

I did my first (of many, I hope) knock-off project a few days ago :)


No catálogo de Verão da "la Redoute", vi um cinto muito simples mas que adorei! É mesmo o que eu preciso para dar um certo "je ne sais quoi" aos meus look... 

In the summer catalogue of "la Redoute", I saw a very simple belt, which I loved! It's just what I need to give my outfits a certain "je ne sais quoi"...


Ainda para mais, já há séculos que tinha posto de lado os laços que o meu namorado usava nos bailes de gala da Queima das Fitas* para aproveitar para algo e assim encontrei-lhes finalmente um destino! Bastou isso, um bocado de fita de veludo preto e uns botões mola e fiquei com um cinto novo, todo "fashion". 

On top of that, I had put aside my boyfriends bowties, which he used in the ball galas of Queima das Fitas*,  ages ago to repurpose and finally had found something to use them for! That, in adition to some black velvet ribbon and some snap buttons, was all it took to make my fashionable belt.


Medi a minha cintura, juntei 10 cm e cortei a fita com esse comprimento. 

I measured my waist and added 10 cm, then I cut the ribbon in that length.


Cosi dois botões mola nos 10com extra.

On that 10 cm flap, I sewed on the snap buttons. 


Depois apliquei o laço com uns pontos, de maneira a ficar bem fixado.

Then I sewed the bowtie on, making sure it wouldn't fall off.


Já está! 

You're all done! 


*para mais informações, leia-se aqui. Um dos eventos da Queima das Fitas é um baile de gala formal, em que as mulheres têm de vestir um vestido formal e os homens têm de levar laço e cinta pretos. Também já tenho planos para as cintas :P
*for more information, read here. One of the events of Queima das Fitas is a gala for the seniors, where women are required to wear formal gowns and men to wear a black bowtie and sash. I already have plans for the sashes :P

post signature

segunda-feira, 10 de janeiro de 2011

Ligas velhas viram fita // Old stockings turn into headband

Como ficaram a saber neste post, eu gosto muito de vestir saias e vestidos, o que, no Inverno, significa usar collants ou meias de liga (gosto mais destas últimas, mas ambas têm vantagens e desvantagens). No entanto, eu sou uma destruidora de meias de nylon, pois, muitas vezes, quando as tiro no final do dia, vejo sempre um ou outro buraco. Quando a situação não dá para ser remediada com verniz de unhas e alguns pontos estratégicos, lá vão (iam) mais umas meias para o lixo...

As you found out on this post, I really like to wear skirts and dresses, which, in the Winter, means using tights or stockings (I like these last better, but both have their advantages and disadvantages). However, I am a destroyer of nylon stockings, so, many times, when I get undressed at the end of the day, I find a hole or two in them. When the problem can't be fixed with nailpolish and some stitches, the trash can is (was) the solution...


Porém, desde que li este post no 365 Coisas que posso fazer, fiquei com a consciência muito pesada (ai, o que eu já contribuí para a poluição do planeta, especialmente na altura da Queima das Fitas*!!) e prometi a mim própria nunca, mas nunca mais deitar fora meias... também não imaginava quantos usos alternativos se lhes podia dar.

However, since I've read this post on the blog 365 Coisas que posso fazer (365 things I can do), I felt very bad about that (oh my, I already contributed so much to our planet's polution, specially during "Queima das Fitas"*!!) and I promised myself never to throw away stockings again... I also didn't know about all the alternative uses you could give them.


Ora, na véspera de Natal vesti o meu vestido novo e é certo e sabido que, quando fui pôr o pijama para me ir deitar, lá detectei mais uns malfadados buracos, dos que já não têm arranjo, nas minhas ligas castanhas. Mas em vez de me dirigir ao cesto do lixo, dirigi-me para a minha caixa de reaproveitamento e as ideias começaram a fervilhar na minha cabeça.

Well, on Christmas Eve I wore my new dress and, for sure, when I went to put on my pyjamas, I spotted some of those dreaded holes, of the unfixable kind, on my brown stockings. But insted of putting them in the bin, I put them in my "repurpose box" and a million ideas started popping into my head.


Uma das coisas em que pensei logo, é que podia aproveitar a parte de renda, a liga propriamente dita, para fazer uma fita (acho que uma das razões pelas quais eu prefiro usar estas meias é precisamente o rendilhado do topo :P ). Há uns dias, lá tirei as meias e propus-me a separar a liga do resto, o que se mostrou uma tarefa muito fácil.

One of the first things I came up with, was to use the lacey part of the stocking to make a headband (I think one of the reasons I prefer stockings is because of that lacey part :P). A few days ago, I took them out of the box and started to separate the lace from the rest of the stocking, which turned out to be a surprisingly easy task.


As tiras de silicone anti-deslizante faziam-me um pouco de impressão. Pensava que as tinha de tapar de alguma forma, se não arrepelavam-me o cabelo todo. Mas antes de complicar, decidi experimentar a "fita" tal qual estava e qual não foi o meu espanto quando notei que o silicone não era assim tão mau - nem me arrepelava e, além disso, até impedia que a fita deslizasse para fora do sítio.

I felt a bit unsure about those silicone strips, that prevent the stocking from sliding down your leg. I thought I had to cover them up somehow or else they would pull on my hair. But before making it complicated, I decided to try it on anyway and I found out that the silicone wasn't that bad - it didn't hurt me and it kept the "headband" in place.

Portanto, deixei-a "ao natural" e só quis fazer alguma coisa em relação à largura. Apesar de gostar de fitas largas, como tenho o cabelo fino, elas criam sempre um efeito volumoso na parte de trás da cabeça, do qual não gosto nada. Para resolver o problema, dobrei a fita na parte que ficaria atrás e dei uns pontos. Assim, ela é larga à frente e estreita atrás.

So, I left it in its "natural" state and went on doing something about the width. Altough I like wider headbands, I have thin hair, so they always create this bulky effect on the backside of my head, which I don't like one bit. To fix this problem, I folded the back part of the headband in half and handstitched it in place. This way, the headband is wide in the front and narrower in the back.


Parte de fora//Outside
Não sei se adiantou ou não, mas como eu li que em tecidos elásticos se deve usar o ponto zig-zag, quando se cose na máquina, eu também usei uma espécie de zigzag, muito rudimentar, na costura à mão e, antes de rematar e dar o nó final, esticava a fita, para ter a certeza de que os pontos não a prendiam. O aspecto por dentro não ficou grande coisa, mas da parte de fora quase não se nota (se tivesse linha da mesma cor da renda, não se veria mesmo nada).
 

Parte de dentro // Inside
 I don't know it if helped or not, but as I read that, when working with elastic fabrics one sould use the zig-zag stitch, I did a sort of zig-zag handstitch and before doing the final stitches, I would stretch the band, to make sure that it would give out. It doesn't look very neat from the inside, but you can hardly notice from the rightside (if I had thread in the same colour of the lace, it wouldn't show one bit).


Pronto, em 15 minutos e a custo zero, fiquei com um novo acessório... Bem melhor do que ir aos saldos :)
Agora ainda tenho uma liga de renda e os dois bocados de meia, mas para estes já tenho um destino em mente! 

So, in 15 minutes and with zero cost, I got a new accesory... It surely beats hitting the  Winter sales :) 
Now I still have one lace band and 2 stocking pieces, but for those I already have something in mind :)


*Para quem não sabe, a Queima das Fitas é a festa do estudante, celebrada todos os Maios em Coimbra (apesar de, hoje em dia, também ser celebrada na maioria das cidades com universidade ou instituto politécnico). Apesar de o traje tradicional do estudante ser usado durante todo o ano, é durante a Queima que mais se vêem estudantes a usá-lo. Esse traje inclui, nas raparigas, um par de meias-calças (ou ligas) pretas.

*For those who don't know it, "Queima das Fitas" is a festival celebrated by the university students, each May, in Coimbra (although, nowadays, every town which has a university, celebrates it too). Although the traditional student outfit can be worn all year round, it's during Queima das Fitas that you see many students wearing it. The female oufit has to be worn with black tights or stockings.

sexta-feira, 10 de dezembro de 2010

Punhos // Wristwarmers


A minha avó tem uma teoria : se nos queremos manter quentinhos, temos de ter as mãos e os antebraços quentes. Por outro lado, se queremos estar fresquinhos quando está muito calor, temos de arrefecer as mãos e os braços com água fria, mas não falemos disso agora... brrr... :)
A teoria da minha avó passou para a minha mãe, que passava os Invernos a tricotar punhos de lã nas mais variadas cores, para ela e para mim. Mas quando fiquei mais velha, o hábito perdeu-se (também não ajudou a "crise" da adolescência, em que não se quer usar nada que seja diferente, com medo de se ser gozado) e os punhos também. De há uns anos para cá, comecei a dizer que tinha de tricotar uns, mas depois acabava por adiar e na Primavera já não fazia sentido estar de volta com as lãs :P No entanto, depois de fazer a cachecola, comecei a imaginar outros usos a dar ao resto da malha e resolvi costurar uns punhinhos!

My grandmother has this theory : if you want to keep warm, you have to have warm hands and forearms. On the other hand, if it's too hot and you want to cool down, wet your hands and forearms with cold water, but let's not talk about that right now... brrr... :)
This theory passed on to my mother, who spent all Winter knitting wristwarmers, in all the colours of the rainbow, for me and her. But when I grew up, that habit was lost ( and also the teenage years, when you don't want to wear anything different, afraid of being mocked by peers, didn't help), and so were the wristwarmers. For a few years now I told myself that I had to knit some again, but I always postponed and then came Spring and it didn't make much sense to fiddle around with wool. :P However, after making the neckwarmer the other day, I decided to make myself some wristwarmers aswell.

Cortei uns quadrados com a altura que queria e a largura suficiente para me cobrir os pulsos. Para que não se desfizessem, dei uns pontos muito simples a toda a largura, bem rentinho às bordas de cima e de baixo (linha vermelha). Pode-se fazer bainha, mas como eu fiz tudo à mão e me deu a preguiça, fiz desta forma mais simples e até gostei do resultado, meio "desalinhado".

I cut some squares with the height I wanted and that were wide enough to fit around my wrist. I quickly top stitched the bottom and top part, so that the knit wouldn't unravel (red line). You can hem them, but as I did it all by hand and I was feeling lazy, I did it this simple way, and I really liked the "rough-edges" look in the end.


Depois, dobrei ao meio e cosi os lados um ao outro, de maneira a formar um tubo (linha verde). Virei os punhos, de forma à costura ficar para dentro e ficaram prontos :)

Then, I folded the square in half and sewed the sides to eachother, so that the whole thing was tube-shapped (green line). I turn them rightside out and they were ready to be worn :)


Apesar de não serem muito grossos, mantêm-me os braços e as mãos quentes e dão um toque diferente à roupa.

They may not be that thick, but they do keep my arms and hands warm and they give a special touch to an outfit.

quinta-feira, 9 de dezembro de 2010

"Cachecola" ou Agasalho ou Abafador para pescoço // Neckwarmer


Uma pequena explicação para o título : eu não sei como chamar a estas coisas em português. Traduzido de outras línguas seria "aquecedor de pescoço", mas acho que é um nome feio... Portanto tomei a liberdade (tal qual o Ambrósio) de re-baptizar este item : não é cachecol, não é gola = é uma (ou um, o género ainda é algo a decidir) cachecola! Não é muito melhor, mas ao menos não me faz vir à cabeça imagens de aquecedores a óleo. Mas aceitam-se sugestões :D

Sugestões :
Agasalho para pescoço - Luísa
Abafador para pescoço - Papgena

Ora bem, eu fiz esta cachecola a partir de um cachecol que já tinha alguns anos mas que tinha pouco uso. Não era feio, mas era assim sem sal - um normal cachecol, um pouco para o largo, às riscas. E além disso, os acabamentos não eram os melhores e não era grande fã das franjas roxas e, por isso, quando tive a fazer a troca do roupa de Verão para a de Inverno, este foi logo para o monte do reaproveitamento.

Well, I made this neckwarmer out of a scarf that I already had for a while but which I didn't wear much. It's not that it was ugly, but it was a tad too plain - a regular kind of wide stripped scarf. On top of that, the edges weren't that well finished and the purple fringes weren't my cup of tea, so, when I was switching my summer clothes for my winter clothes I put this right on the repurposing pile.


Cortei um bocado de cachecol que desse a volta ao meu pescoço e ficasse com o comprimento que eu queria. Dobrei esse bocado ao meio, pelo cumprimento, e cosi a quase toda a volta. Deixei apenas um espaço suficiente para virar todo o cachecol e depois fechei a abertura.


I cut a piece of the scarf, big enough to go around my neck and have the final length I was looking for. I folded that piece in half, lengthwise, and I sewed almost all around it. I only left a gap big enough to turn it rightside out and then closed that opening.


A partir daqui as coisas variam consoante o gosto de cada um. Pode-se deixar a cachecola como está e fechá-la com a ajuda de uma pregadeira. Eu preferi pôr um botão. Como não tinha nem queria comprar um botão que combinasse, usei um velho que aqui tinha e forrei-o com um bocado da malha. Depois, preguei-o à aba que ia ficar por baixo e, na aba de cima, fiz um casa muito rudimentar, para poder fechar a cachecola. Por sugestão do meu namorado (tenho de lhe dar o devido crédito), preguei outro botão igual na aba de cima de cima, abaixo dessa casa, mas para efeitos puramente decorativos.

From here on, the options are various, depending on our personal taste. You could leave the neckwarmer as is, closing it with a broche or so. I decided to put a button. As I didn't have a cute button, nor did I want to buy one, I used an old one I had laying around and covered it with a bit of the same knit-material. Then, I sewed it on the neckwarmer and made a rudimentar buttonhole on the overlapping flap, so I could  button the neckwarmer up. My boyfriend (I must give him credit) suggested I sewed another button on the upper flap, under the button case, to embelish the whole thing a bit more.
Fiquei com um acessório muito giro e prático. Concluí que, ao contrário dos cachecóis normais, estas cachecolas podem-se usar mesmo dentro de casa ou no trabalho, sem que estorve a nossa actividade e sem ter o ar de "roupa de rua" :)

Now I have a very cute and practical accesory. I reached to the conclusion that, unlike regular scarfs, neckwarmers can be worn even inside the house or at the office, withouth disturbing our activities or having that "outer wear look" :)

domingo, 17 de outubro de 2010

Flor : seguindo um passo-a-passo / Flower : following a tutorial

Encontrei esta linda flor nas minhas andanças pela Internet. Achei-a tão perfeitinha, que assumi automaticamente que ia ser muito difícil e que, à primeira tentativa, iria sair uma valente porcaria. No entanto, peguei num restito de tecido vermelho, baratucho e fiz a minha primeira flor de pano, para praticar.

I found this lovely flower while surfing on the Internet. I thought it was so perfect, that I automatically assumed it was very hard to make and that my first attempt at it would turn out to be a real mess. However, I grabbed a piece of red cheap fabric and I made my very first fabric flower, just for practice.

Fonte

Segui o passo-a-passo de perto. Mas como está em inglês, eu explico os meus passos num instantinho :
1- Desenhei, com ajuda de um CD, 6 círculos num pedaço de pano e recortei-os.
2- Dobrei cada círculo a meio e depois novamente ao meio, ou seja, fiquei com quartos de círculo - estas serão as pétalas.
3- Com ajuda de agulha e linha (bastante linha) comecei a dar pontos na parte aberta das "pétalas", uma a seguir a outra. No fim, puxei a linha para ficar com aquele aspecto repuxada e cosi a primeira pétala à ultima.
4- Peguei num bocado de tecido de ganga ( as instruções dizem feltro, mas não tinha), cortei um círculo e cosi à parte de trás da flor.
5- Com uma apara do tecido vermelho, enchi o o espaço que ficava entre o círculo de ganga e as pétalas. Depois, fiz uma bolinha com mais uma apara de tecido vermelho, peguei num tecido de outra cor e forrei essa bolinha - este será o botão ( as instruções pedem algodão, mas as aparas funcionam e, assim, não se deitam fora).
6- Cosi o botão no centro da flor.
7- Preguei um alfinete de ama na parte de trás e ficou pronto.

I followed the instructions closely. As they're in English, I won't explain mt steps, but just add a few notes : 
1- I didn't use felt for the circle at the back of the flower, I used a bit of denim.
2- I also didn't use cotton for the stuffing part. Instead, I used the scraps of the red fabric, it works just as well and you so don't have to throw them away.


Ao contrário do que estava à espera, ficou bastante bem. É mesmo fácil e não é preciso máquina de costura, o que é óptimo para quem ainda não tem :P E não me demorou mais do que 20 minutos.

Unlike I expected, the end result was very cute. It's really easy and you don't need a sewing machine, which is great for those who don't own one yet :P And it didn't took me more than 20 minutes.

sexta-feira, 15 de outubro de 2010

Fita de cabeça e Aquecedor de Orelhas : 2 em 1 / Headband and Earwarmer : 2 in 1

Mais uma noite fria, mais um mini-projecto de tricot. Este também dá uma prenda simples e prática, barata e fácil de fazer.

Another cold night, another mini-knitting.project. This one also makes a simple and practical gift, cheap and easy to knit.


Desta vez, a tira tricotada foi mais larga e comprida, 7,5 cm por 40 cm, mas tudo depende do tamanho da cabeça e do gosto pessoal. Depois de acabada, foi só coser as duas pontas, com fio da mesma lã. 

This time, I knitted a wider and longer strip, 7,5 cm x 40 cm, but it all depends on the head's size and personal taste. After it was finished, all I did was sew the two ends together, with a bit of the same wool.


Pode-se usar como fita normal,
You can use it like a normal headband,


 ...ou como aquecedor de orelhas - é só puxar um bocadinho à frente (óptimo para as passeatas do Inverno).
... or as an earwarmer - just pull it a bit further (great for those Winter walks).


O melhor é que dá para enfeitar como quiserem!

The best part is, you can embellish it as you like!

                                                          
Lembram-se deste pequenote? Já tem mais um uso :)

Remember this little fellow? I've found another use for it :)


domingo, 10 de outubro de 2010

Lacinho Embrulhado / Wrapped up little Bow

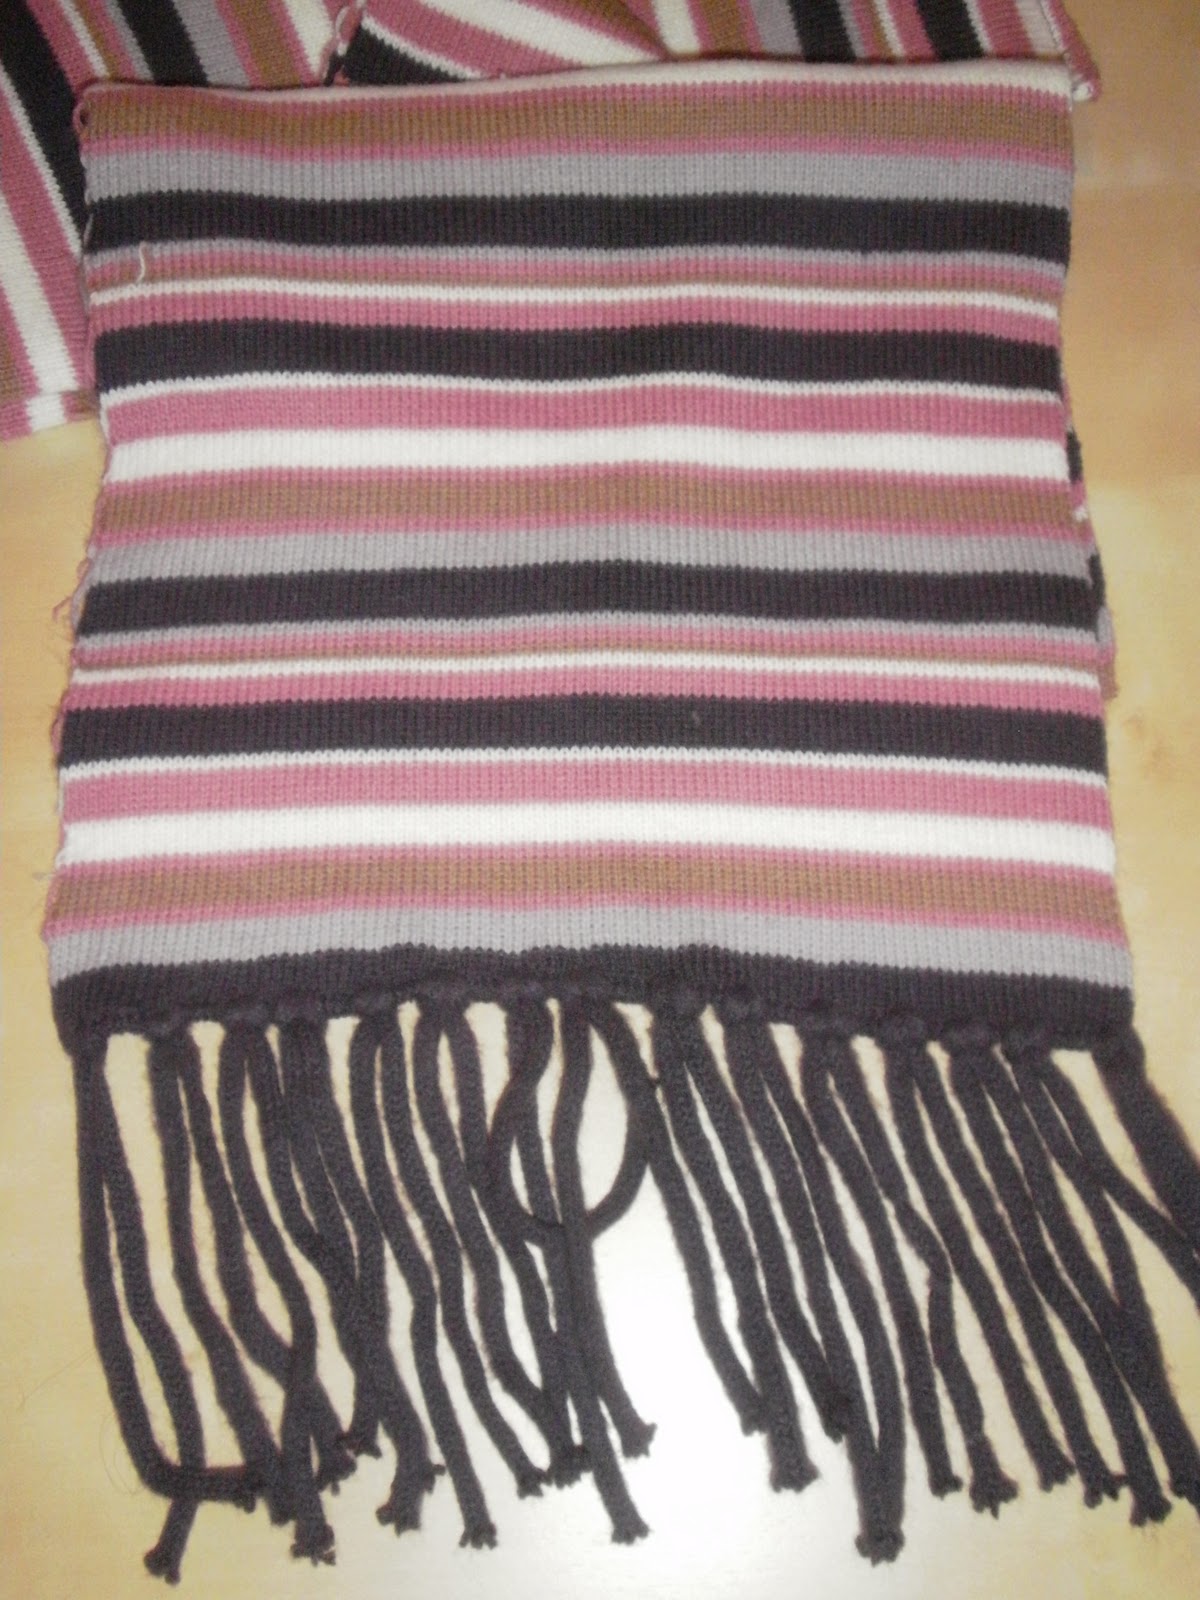
Com o Outono aí em força (apesar do solzinho de ontem), já me apetece enrolar na mantinha e fazer tricot à noite :) Gosto muito de tricotar, é muito relaxante, apesar de ainda ser uma naba completa e só saber fazer os dois pontos básicos. Como, por agora, não posso comprar lãs novas, já que os trocos que sobram vão todos para equipar a casa, tenho de satisfazer a minha vontade com os restos dos anos anteriores, que não dão para projectos muito avultados. Uma das coisas que me lembrei de fazer foram lacinhos, muito fáceis, que dão para usar no cabelo (com um ganchinho) ou na roupa, numa fita ou cinto (com um alfinete de ama), e práticos para oferecer nos inúmeros aniversários das "filhas do Outono" e, claro, no Natal, como pequenos miminhos, feitos com carinho (as melhores prendas para dar e receber). Como tenho um aniversário à porta, pus as mãos à obra.

With Fall banging at our doors (despite yesterday's shiny sun), in the evenings, I already feel like wrapping up in a blanket and knitting :) I really like to knit, it's very relaxing, although I'm a complete noob, who only knows how to make the 2 basic stitches. As, for now, I can't afford to buy new wool, since all the spare money is spent on equiping our home, I have to satisfy my urges with past years leftovers, who aren't enough for big projects. One of the things I thought about doing were little bows, very easy to make, that can be worn on your hair (with a little hairclip) or on your clothes, hairband or belt (with a little safety pin), and which are practical to give away for the inumerous "daughters of Autumn" birthdays and, of course, Xmas, little treats, made with love (the best gifts to give and receive). As I have a frind's birthday coming up, I decided to put my thoughts in action.

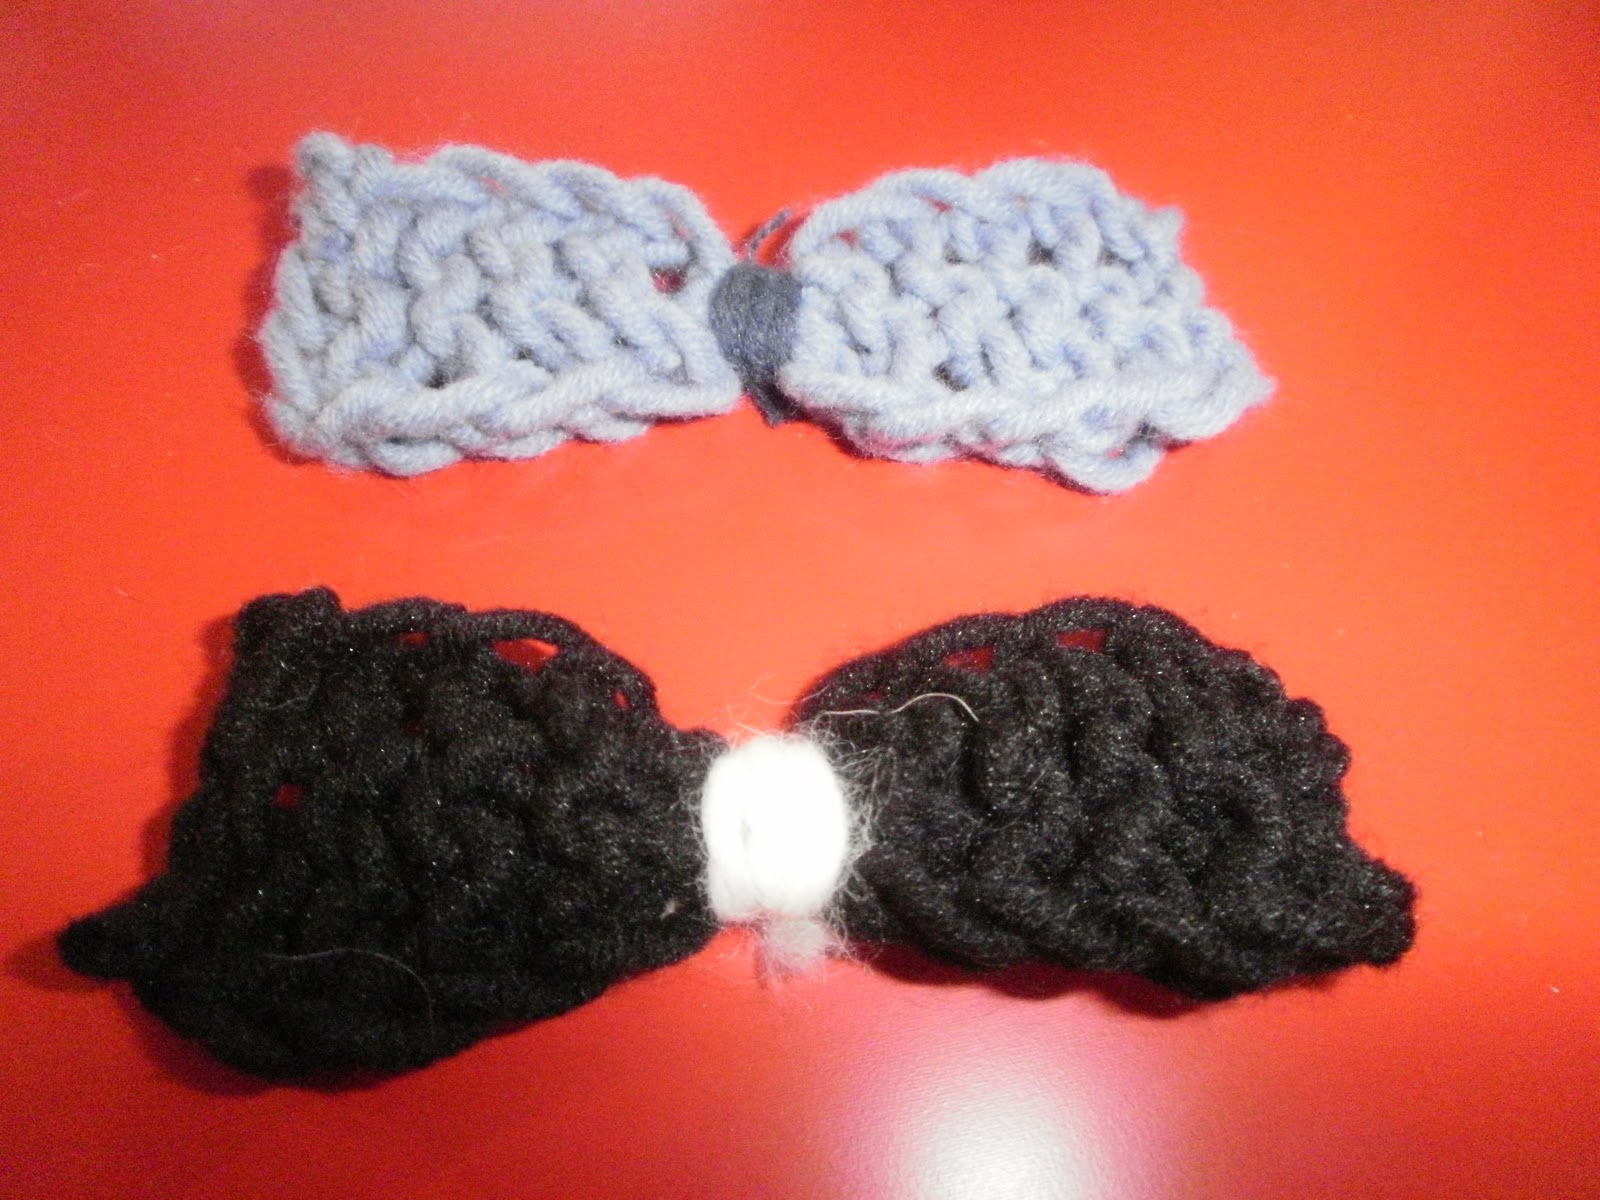
  Basta tricotar uma tirinha, com a largura de 5 cm e comprimento de +/- 12 cm.


All you have to do, is knit a little strip, 5 cm. wide and about 12 cm long.
 Depois, com uma fita ou lã de outra cor que combine, dão-se umas quantas voltas no meio da tira e forma-se o laço, dando 2 nós no final.

 Afterwards, you take a different colour, but matching, ribbon or  piece of wool, and you wrap it around the centre of the strip, giving shape to the bow and tying it in the end, with 2 knots.
Cortam-se as pontas soltas e prende-se, na parte de trás, um ganchinho ou um alfinete de ama.

Cut off the loose ends and attach a hairclip or safety pin in the back.


Já tinha feito um para mim, em azul, para combinar com as calças de ganga. Mais giro do que usar como ganchinho para prender o cabelo à frente (no meu cabelo finito, não se aguenta), fica engraçado a enfeitar a parte de trás da cabeça, como podem ver na foto.

I had already made a blue one, for myself, to match my jeans. Cuter than using it to secure your bangs (this way, it doesn't stay put , because of my very fine hair), is using it on the back of your head, as you can see in the picture.


Mas para além de fazer o laço, este também tem de ser embrulhado. Para isto peguei em duas ideias que fui buscar à blogolândia. 
No site Homemade Mammas, de que já falei, encontrei um tutorial para fazer embrulhos a partir de rolos de papel higiénico (matéria-prima farta em qualquer casa com WC, digo eu ). Ficam pequeninos, mas chegam para este tipo de coisinhas. Só que, se não há dinheiro para lãs, também não há para tintas, pelo que deixei o meu rolo "virgem". E sabem que mais? Ficou bem giro.

But on top of making the bow, it also needs to be giftwrapped. To do this, I thought of two ideas I got out of "blogland".
On the Homemade Mammas website, which I have already mentioned, I found a tutorial to make favor boxes out of toilet paper rolls (a raw material abundant in every home with a WC, I think). They're kinda little, but tiny things fit in beautifully. However, if there's no money for wool, there's also no money for paint, so I left my roll in its "virgin state". And you know what? It turned out real nice.


Só que faltava uma gracinha e quis atar uma fita à volta, com um enfeite qualquer, para não ficar tão nu. 
Puxei pela cabeça e lembrei-me das flores que a Poupadinha fez com caixas de ovos. O passo-a-passo está muito bom e saiu uma florzinha bem bonita.

It was only missing a little something-something to make it fun and I wanted to tie a ribbon around it, with a small embelishment, so it wouldn't look so naked. I did a little brainstorming and remembered the flowers Poupadinha made out of egg cartons. The tutorial is very good and out came a cute little flower. 

 
 Mais uma vez, deixei por pintar, só fiz um furinho no centro da flor e enfiei as pontas da fita (um resto de um ramo de flores que tinha por aí) pelo buraco e dei 2 nós, ficando com aspecto de botãozinho :)

Once again, I left it unpainted, all I did was a tiny hole in the centre of the flower, through which I pulled the two ends of the ribbon (some leftovers from a flowerbunch), tied them twice, and it ended up looking like a tiny button.


E pronto, assim se fez uma prendita e respectivo embrulho, sem gastar dinheiro nenhum e feitos a pensar na pessoa destinatária :)

There you go, a nice little gift and wraping, with no need of spending any money and made while thinking of the receiver :) 


*Para manter um bocadinho da surpresa nas cores, o lacinho aqui demonstrado não é o que vai ser oferecido. Este vai ficar também para mim... Uma rapariga nunca tem acessórios suficientes, não acham? :P
In order to keep the colours a surprise, the bow shown here is not the one that's going to be given. This one can stay with me... A girl can never have too much accessories, right? :P